While playing around today on M3D, on a whim I decided to click on the Cutting tab in the Render window, just to have a look. 'Turns out, cutting can be a whole lot of fun :)
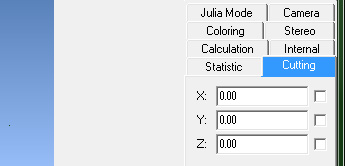 |
| The Cutting Tab |
To best demonstrate this great little tool, I'm going to use the same formula that loads on default when opening the program, except, I'm going to change the power and make it 2 instead of 8. Now many of you may have already loaded this formula with this little change, since the original 2D Mandelbrot set uses the 2nd power. And many of you would have gone, "Hmm, but that looks nothing even near the amazing Mandelbrot set!" ... Well, if you slice that weird looking thing using the cutting tool, you'll see something more familiar ;)
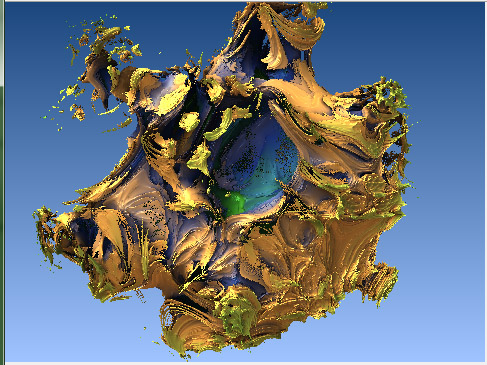
Allow me to demonstrate. Here is the very strange looking 3D version of the Mandelbrot set:
 |
| 3D Mandelbrot Set |
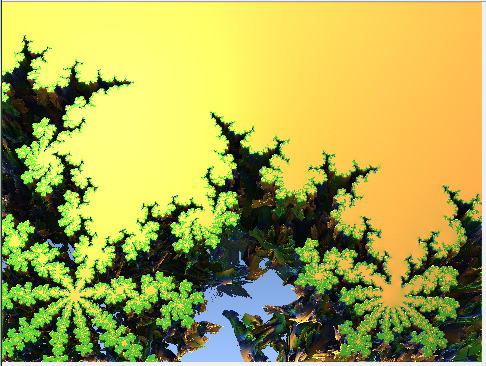
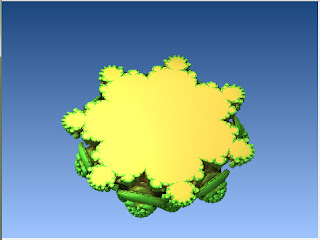
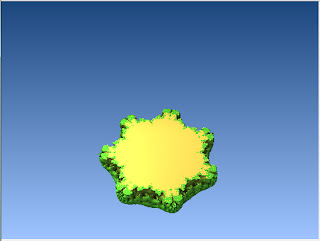
Next, I simply clicked on the z-axis checkbox (See image above), left the value as 0.00, and clicked Calculate 3D ... :
 |
| 3D Mandelbrot Set cut along z Axis at 0.00 |
:) ... Remember this? Isn't it beautiful? Now, the nice thing about this is that, you can zoom into those little nooks and crannies, some of which are not really reachable when you're trying to navigate the entire 3D fractal in it's full bulk. Here, let me show you...:
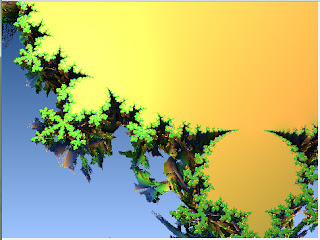 |
| Zoom-in 01 |
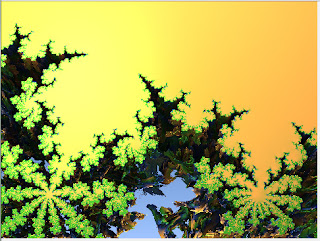 |
| Zoom-in 02 |
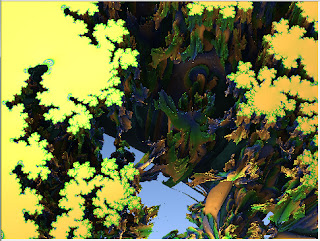 |
| Zoom-in 03 |
Nice :) Now let me change the colouring a bit so we can better see what's going on in there:
Well, it's only a little better, but you get the idea :) ... From here you can choose a spot, zoom in, zoom back out again, choose a different spot and try again, etc... With different formulas even the most experienced 3D fractalnauts would be able to find new and interesting areas had they never used cutting before.
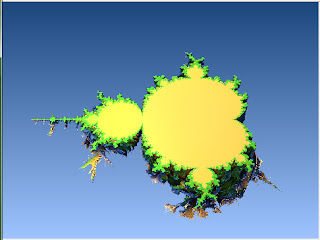
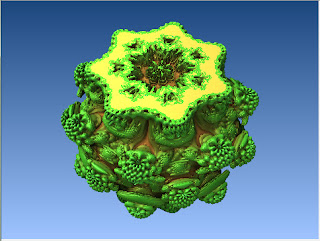
Ok, now I'll load the original Mandelbulb (power 8) to demonstrate further. Here she is, cut in exactly the same way as above:
 |
| Mandelbulb cut along Z-axis at 0.00 |
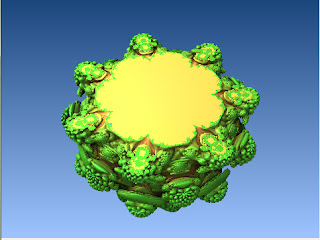
Now, what happens if we change the value "0.00" ? It gets cut through either higher or lower, depending on, of course, whether you put in a positive or negative value. Here is a series of screenshots to demonstrate:
 |
| Mandelbulb cut along Z-axis at -0.8 |
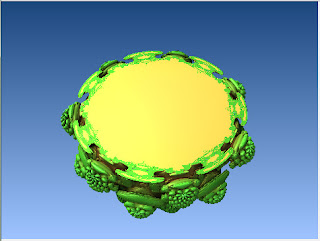
 |
| Mandelbulb cut along Z-axis at -0.4 |
 |
| Mandelbulb cut along Z-axis at -0.2 |
 |
| Mandelbulb cut along Z-axis at 0.3 |
 |
| Mandelbulb cut along Z-axis at 0.6 |
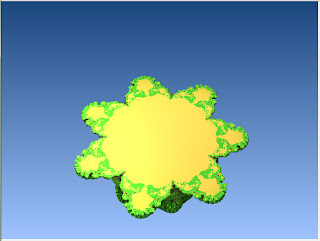
So it follows that the same thing can be done with the x and y axis. And you can turn any/all of them on at the same time. Here I cut the Mandelbulb along the z and y axi, both at 0.00 (with a bit of rotation for a better view):
And that concludes my 5th Tutorial page about the wonderful Mandelbulb 3D program. Thanks for watching! :)
If my tutorial is helping you, please consider supporting me over at my
Patreon page.
I also have a
deviantArt gallery.
Go to the next Tutorial page - Mandelbulb 3D Tutorial: Render Quality